In this blog post, I discuss and provide tools and ideas for the first standard for students, “Empowered Learner”. Future blog posts will include appropriate tools for the other six standards. If you would like to get some background information about the new standards, please read my previous blog post “Talking Tech: The New 2016 ISTE Standards for Students (1 of 8)”
***Please be aware that I do not pretend to be an expert on the new ISTE Standards. This blog post series was initiated as a “project” for me to learn and understand these standards, so that I can provide better instruction to my students. If you have any comments, questions, corrections or suggestions, please do not hesitate to share them in the comment section.
If you would like to read some of the documentation created by ISTE to explain and support educators in the adoption and practice of these new standards, here and here you will be able to find useful information
Standard 1: Empowered Learner
Students leverage technology to take an active role in choosing, achieving and demonstrating competency in their learning goals, informed by the learning sciences.
This first standard captures the essence of the new set of standards updated in 2016. Throughout the refresh process, the theme of empowered learners surfaced repeatedly. Empowering students in our classrooms provides many present and future benefits. To quote the Redefining Learning in a Technology Driven World report, “[Empowered students]… do better in inequality of access situations, are able to personalize their learning and achieve regardless of ability and build dispositional skills, such as executive functioning, perseverance, self-awareness and tolerance for ambiguity, that many believe are necessary to thrive in current and future society.”
Let’s dive into the tools and activities educators could use to support and empower their students both in and out of the classroom. I decided to break down the standards further (into their specific objectives), so that it provides a clearer understanding of each, and will be easier when educators look for a specific one to work on.
Standard 1a.
Students articulate and set personal learning goals, develop strategies leveraging technology to achieve them and reflect on the learning process itself to improve learning outcomes.


Setting Goals and Keeping Track of Them
LifeTick– This is my favorite goal tracking site. The school version is not free (30-day trial), but is totally worth it. It helps students learn about SMART goals, there is a journal integration (with categories and sub-categories), a progress visualization tool, and more. The interface is simple yet very customizable. Teachers can interact with their students by sending instant messages and leaving comments.
GoalsOnTrack– Create SMART goals, break them down into manageable chunks, and come up with measurable results. Keep track of them daily while online or offline, create a to-do list, track how long tasks take you, print out daily planners, and even visualize your success by uploading your image and watching yourself celebrate! There’s a lot to do to set up, but it’s an ongoing and engaging site. The app supports all major mobile platforms. There is no option for teacher oversight, so students will need to be more independent to keep track of their goals, and screenshoot/print them as evidence.
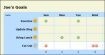
Joe’s Goals– This is an extremely simple (one page) goal tracking site Joe made for himself and now we can use it too. Students can simply create an account, type their goals, track them daily, and work to achieve them. There is no option for teacher oversight on this app as well.
Accelerated Reader– (Paid) This is a reading management program that aims to encourage independent reading habits. Students read books, take a quiz on each book, and together with their teacher can set goals and reflect on their progress. Teachers can assign reading levels and goals and modify them, view the quizzes taken and delete them, and more. Here is a study about the program’s effectiveness.
Reflection Tools
One excellent tool to set goals, achieve them and reflect on them is the creation and maintenance of an ePortfolio. There are several excellent free tools to create student ePortfolios, varying in appearance, difficulty level, and control/sharing option.
Seesaw– This is a simple ePortfolio option for little ones. It allows students to easily show their work using photos, videos, drawings, text, PDFs, and links. They can then reflect on their work using text, audio or drawing. The teacher interface allows teachers (and parents) to access and monitor student work.
Google Slides– This is another child-friendly ePortfolio option, which works best if your school has access to the G-Suite (formerly GAFE- Google Apps for Education). Google Slides allows your students to embed a variety of file formats from their Drive folder- documents, images, drawings, animations and videos, and add text to them to show their learning. In my classroom, I make sure students create a Table of Contents whenever they use Google Slides and hyperlink the text or images to other slides in the presentation.
Google Sites– I have been using the old Google Sites as my own website and ePortfolio for several years. Although it was not the most intuitive tool, it did provide great options and I was able to embed documents, images, presentations, etc. from my Drive. However, soon, the old version will become obsolete, and the new Google Sites will be the only option. Albeit simpler interface, it does little of what that old Sites can do. This being said, integration with Drive is fantastic, and it is really easy to embed student work and insert text to explain it. Two problems with it though- you cannot (yet?!) create templates for students to use, and images randomly turn sideways… (to get around it we paste them on a Google Doc or Slide and embed it on the portfolio page).
Mahara– Mahara is an open source software used by many secondary schools and universities around the world to document and store their students’ work. Although by no means simple to navigate through, it does offer many higher-level options for users, since it is not “just” an ePortfolio platform. You can create network of friends, use open-source coding, and more. It is also highly customizable at the institution level, so it can do pretty much anything you’d like. Lastly, it has excellent integration with Moodle, and many plugins continue to be developed to make it even simpler to use together.
Other ideas/tools for reflection:
Video reflections- Have students respond to prompts while recording themselves speaking or demonstrating their understanding. For video reflections all you need is a video camera, but here are some tools to upgrade the experience…:
Explain everything– this iOS app is a fantastic tool to demonstrate understanding. It is basically an interactive whiteboard you can screencast (both audio and video). Students create their canvas (texts, images, shapes, audio, video, documents, etc.) and record their understanding and/or reflections, and at the same time rotating text, flipping it, and animating it. My 5th grade students love it!
Adobe Spark– Make your stories come to life! This is a great tool to create all kinds of high quality visual content. It works all the way from younger students to adult professionals. There are three options to choose from:
- Spark Post- add text and filters to images; annotation of work in progress
- Spark Page- create online stories by turning images and text into magazine style communication tools
- Spark Video- record voice, add images, icons and soundtrack
Here are some more journaling apps to choose from (from AppAdvice).
Standard 1b.
build networks and customize their learning environments in ways that support the learning process.


Building networks
Providing students with opportunities to create networks and extend their learning beyond the classroom (or their country) is an important task. Although most students with access to tools and internet access do so by taking part in internet-based multi-player games, or keeping in touch with friends using Skype, Facebook, or Instagram, these environments focus on the social aspect rather than the academic one, where they utilized these connections to extend their learning.
Below are several tools, which can be used in classrooms, to help students learn about networks and communities, and utilize existing tools create and maintain them:
Twitter– A great way to tell the world what our class is doing and to connect with other classes, groups, or individuals that could contribute to the class’s learning. It also works great when students want to learn about particular topics or want to ask the community questions.
Edmodo– With over 75 million users, this evolving educational social network is the answer to Facebook’s age restriction. This is a walled garden (closed online social environment), and teachers have the oversight they need to ensure students communicate effectively. Teachers can create groups and invite students’ parents, assign work and quizzes, post discussion groups, award badges, and much much more. If you decide to go for it, don’t forget to look at all the plugins developers keep creating. Finally, there is a very active and supportive online community if you have any questions!
Facebook– Creating groups (or secret groups…) is a great way for teachers and students to communicate and learn about other communities and individuals. Different educators and parents feel differently about Facebook, but here is one educator’s experience and views on Facebook and Education.
Skype in the Classroom– This growing educational network is a fabulous way for students to connect with other classrooms, places and experts around the world. The experiences are divided into 5 parts:
- Virtual field trips– take your students anywhere without leaving the classroom!
- Skype lessons– Looking for an interesting lesson about biomes? Aliens? Hook up with other educators and browse the extensive list of lessons created by fellow educators and curated by Skype.
- Skype collaborations– Teaching a unit about architecture? Connect with other educators around the world and collaborate to learn about how similar and different architecture is in different parts of the world.
- Mystery skype– A fun activity where students in one part of the world meet another group and asks questions to find out where they are from. A great Social Studies lesson with a possible Language Arts connection (pen pals?)
- Guest speakers– Learning about anything in particular? There’s someone half way across the globe who know what she is talking about! Why not have your students interview her?
Instagram– Create a class account, share different aspects of your classroom, and connect with other classrooms. Use images to connect your students to the world- create a scavenger hunt, show a class field trip, share reading recommendations, and more! Here are some more ways to use it in your classroom, and here are some hacks for educators.
Google+– (age 13+) A G+ account would allow you and your students to connect with individuals, groups, and communities across the Web. Create specific Circles for specific members (members are not required to add you to their circle even if you added them!), share resources, learn collaboratively, and more. You can also connect using Google Hangouts, but that’s a different story… Here is how to start your own G+ community.
Customizing Learning Environments
Differentiation is a buzz word these days. Educators understood that the one-size-fit-all instructional practice used in the past is not the best way to reach every student in our classroom, and so began the journey into ways we can tailor our teaching to the individual learner. Blended Learning and Flipped Classrooms are two instructional strategies we can achieve this goal as educators, so let’s examine some tools for students to customize their own learning environments.
The key to this objective is choice. Choice in what students wish to focus on (the process), or how they would like to show their understanding (the product) is extremely important. Among other benefits to it, choice increases student self-esteem, motivation and ownership, but it is important for students to know who they are as both students and humans, so that their decisions have more positive long term effect.
Khan Academy– This incredible website offers users (kindergarten to high-school) free self-paced online courses in subjects such as mathematics, science and engineering, arts and humanities, economics and finance, and even offers a variety of test preparation courses. The website allows students to choose their course, read and watch instructional videos, practice their understanding, and get assessed. Using adaptive technology, the website identifies students’ strengths and gaps, and adapts instruction to their level. Being a school-friendly website, one (or more) teachers can create classes and push a variety of content to their students, in addition to the content students choose for themselves.
EdX– A Harvard/ MIT collaboration from 2012, this website offers almost 1,000 college and university courses in subjects such as computer science, languages, engineering, psychology, writing, electronics, biology, or marketing, for free (or for a minimal fee if you want a “verified certificate”. Those who successfully complete a course receive a verified certificate, which they can use to show their university or employer they completed the course. There are courses in 12 languages
Here are some more website that offer similar courses.
Another way to approach this objective (thank you, Aaron TD!) is to examine the ways in which students set up and tweak their work environment to become more successful. Let’s look at how this could look like in the classroom:
Personalizing browsers- Knowing what your browser can do and how you can use it to your advantage is a must, if we want to be organized and get things done quicker. The great ideas Firefox or Chrome have come up with have pretty much become an industry standard- Bookmarking, pinning tabs, using add-ons (Firefox) or extensions (Chrome), adding users, finding pages we visited, setting a homepage, browsing the net privately, deleting third-party cookies, or erasing pages we visited are only a few of the options we get to customize in our browsers. Here are some tips for making Chrome, Firefox and Safari truly your own workbench.
Picking tools just for us! Although this could go under the above category, I think it deserves its own space. The tools I’m referring to are both things our tools can “innately” do for us (such as assistive technology tools) as well as the add-ons and extensions that can help us do work better- ones we can add to our browser and get access to immediately. Here are some examples:
Google Chrome:
- Accessibility:
- Surfing the web anonymously
- blocking annoying ads
- taking screenshots
- turning the web into PDFs
- Quick sharing to social media sites directly from the browser
- More accessibility extensions and apps
- Assistive Technology:
- Adjusting screen colors
- Word prediction
- Text-to-speech tools
- Read&Write tool for ELL or students with Dyslexia
- Adjusting lines
- De-cluttering webpages for easier reading
- AppWriter is a paid extension (one month free trial) that integrates many of the above tools into one.
- Here you can find more assistive technology Chrome apps and extensions.
Firefox:
- Customizing the web (know any JavaScript?!)
- Reading .ePub files
- Need a VPN?
- Addicted to annoying sites? This site will block them for you!
- Download videos to watch later?
- Need a quick translation?
- Here are some great accessibility tools for Firefox- from enlarging buttons to image tweaking to de-cluttering pages.
Here are assistive technology more tools- whether Mac or PC, Android or iOS…
Learning from others– As a regular tech user, I know my sources. If I’m bored and need to build something, want to know how something works, or need to find if last night’s twitter rumor is true I know where to go. There are many tools students can use to help them in their studies, passions, or free time. Here are a few:
- Feedly (RSS Feed)- Hear about what you want from whom you want when you want!
- Subscribe to the blogs you like so you can learn and get enriched!
- YouTube Channels– Finding a great teacher online can sometimes be a daunting task. Find the “teacher” you like, and subscribe to their channel.
Standard 1c.
use technology to seek feedback that informs and improves their practice and to demonstrate their learning in a variety of ways.


Seeking and Utilizing Feedback
The importance of teacher and peer feedback cannot be understated. When students work and create products but do not get the opportunity to receive constructive feedback, they rarely know how to improve their work. Here are some tools that allow students to receive feedback and engage in conversations that would hopefully allow them to reflect on their work and know what and how they could create better products.
G-Suite– The collaborative nature of the Google Suite is what I like most about it. Students can very easily work with others to create products, to discuss and analyze it, and to hear what others think about their work. Allowing peers to “Comment” (rather than to only view or to be able to edit a document, presentation, etc.) is an excellent tool to give and receive feedback once students have revised and edited their own work.
Blogging (any blogging platform, such as WordPress, Weebly, Blogger, etc.)- When students share their learning and ideas with the rest of the world, it is inevitable for others to have an opinion about it. Having students create and share their blogs with peers or with the rest of the world, and making sure they get sufficient practice commenting and responding to comments would allow them to be more conscious of their authoring.
GoodReads– This and other online book depository that allow users to share their books, often also let them engage in book discussions about different topics, hence expressing opinions and giving/receiving feedback. For example, I set up a closed book discussion group for my 5th graders. I pose discussion questions, they reply to them, and then comment on each other’s thoughts, opinions, and understandings. A closed group discussion allows them to practice giving and receiving feedback before I introduce them to groups that are open to the rest of the world.
Demonstrating Learning
Explain everything– Explain Everything is a great (iOS) screencasting app that allows students to show their learning in a visual way. Creating tutorials of learned concepts (my students love creating their own multiplication tutorials!), or simply explaining how something works or how they figured out a concept.
ScreenCastify– (Chrome extension) Another great screencasting tool to allow students to show their learning through the recording the screen and adding a voice explanation. The free version allows for up to 10 minute videos, which is plenty to explain concepts (or at least create a “part one”…).
Video Recorders- Especially for more visual and active learning, videotaping is a great way to demonstrate acquisition of skills. Can students dribble a ball? Can they explain how they solve mathematical equations? Videotaping themselves (or someone videotaping them) is a great option.
iMindQ– This and other mind-mapping tools allows for students to show the ways they organize things and make connections. iMindQ is a paid software but a real powerhouse! It offers many templates to start with, it has a great integration with MS Office for flowcharts and presentations, and it is a collaborative tool. If you want to learn about more MindMapping tools, you can do so here.
Standard 1d.
understand the fundamental concepts of technology operations, demonstrate the ability to choose, use and troubleshoot current technologies and are able to transfer their knowledge to explore emerging technologies.

Understanding How Technology Works
In order for students to understand how technology works, they often need to step away from the couch and cross to the other side- to take off the consumer shoes and get into those of the creator. Here are some resources to help students learn how technology works, both as consumers and as creators.
Tutorials- From video software tutorials on YouTube to interactive ones “on the job” (such as the Chrome Extension “G-Suite Training”), the Web is full of tools that equip users to learn how to solve their own problems. It’s no wonder YouTube is the second largest search engine (after Google, of course…). So whenever students are not sure what to do, consider directing them to Google and YouTube to find their answers.
Coding- Code.org and Hour of Code have become a commonplace in many classrooms. Whether it is coding using block-based programs like Scratch or Tynker, language-based coding like HTML5 and CSS, C, Java or Python, or coding in a Robotics Club using Lego Mindstorm– all of these options give students opportunities to develop their patience, thinking, mathematics, collaboration, and much more. This glimpse of what happens behind the scenes allows them to understand how the technologies they use every day work.
Google Search– Learning how to find what you want is a lucrative skill these days. Learning how Google Search works saves time and a lot of energy. Teachers can, and should, start educating our students from a young age what the “do not include” (-) or quotations (“”) do, and how to use the advanced search and Search Tools for each of the types of result (All, Images, Maps, Videos, etc.). Here is a Google Search for Google Search Tips and Tricks.
Choose, Use and Troubleshoot Technologies
Giving students time to use and tinker with different software and apps is the best way to get them to learn how to solve their own problems, so if you incorporate a variety of technologies in your classroom it means you’re already on the right track. This being said, in order for students to be able to troubleshoot, they will need to have the right mindset- the one of an engineer who is not afraid to try, fail, and try something else again and again until an acceptable solution is found.
Here are a few ideas and resources to help students solve their own problems:
This is a great website that encourages students’ problem solving thinking and skills.
G-Suite’s App Training– If your school is a G-Suite one, then your students would be able to take advantage of the training that’s specific to your school, so ask your administrator it that is available. The trainings are great- providing students tutorials and hands-on activities to test their understanding across the suite. If your school is not, you can still take advantage of the G-Suite Training Chrome Extension that offers simple and interactive tutorials to get you on the right track.
Transfer Knowledge (to Explore Emerging Technologies)
How can students use technology to apply what they learn in new situations and settings? Helping students become familiar with the tools they use, and giving them ample opportunities to practice and explore is the first step. Here are some ideas that would encourage students to do just that, and at the same time have fun to do and/or create what and how they like (that choice word again…):
- Unstructured time on the computer- The best learning takes place when students are actively exploring their world. Giving students opportunities to play around can illicit some interesting and creative results. For example, when I reward my students with “free” time on the computer, they do some amazing things- trying out different customizations in Google Slides or Bitmoji, and other software, teaching each other how to actualize their ideas and plans.
- Exposing, Modeling exploring and applying- Teaching students how to use particular tools and then exposing them to similar programs where they can apply their understanding to create better products, is an excellent way to
- Taking Notes: Microsoft Word, Google Docs, Microsoft’s OneNote, Google Keep,
- Research: Begin with a basic search (on Bing, Google, YouTube, etc.), and deepen their understanding using Google’s Search Tools (for images, news, videos, etc.). MS/HS students can use Google Scholar, online reference systems (like EBSCOHost), and news site feeds that collate information that are arranged by topics (such as Science Daily or Newsela).
- Organizing information: Start with paper graphic organizers, then have students use mind-mapping software like xMind, or create their own graphic organizers using net.
- Presenting information:
- Posters: Progress from a paper poster to the online interactive posters like ThingLink or Glogster, or even create an infographic using the beautiful Canva.
- Presentations: Start with PowerPoint, then move on to the collaborative Google Slides, or the more advanced Prezi.
- Hour of Code (see links above): Learning how technologies work helps students to understand how programmers and designers build websites or games, how videos and other content are embedded, and more. These understandings and skills gives them the tools to do so themselves. For example, using the block-based coding software ‘Scratch’ builds students’ understanding of how language-based coding such as Java or HTML5/CSS work, which in turn, they can use these skills to create their own website.
That’s it… I hope you find above set of activities and tools useful when thinking about, or working with your students on, standard one, Empowered Learner.
Next one up, standard two, “Digital Citizen”. Given the fact that research and tool collection for this standard took me about 8-10 hours, it might be a while before the next one comes out. Please bear with me…
No comments:
Post a Comment